Linnpower EVO Mk1 - Miss Linn
Introducing Miss Linn
As a refresher.
Go check out the past blog on the start of the electric longboard adventure we find ourselves in the middle of.
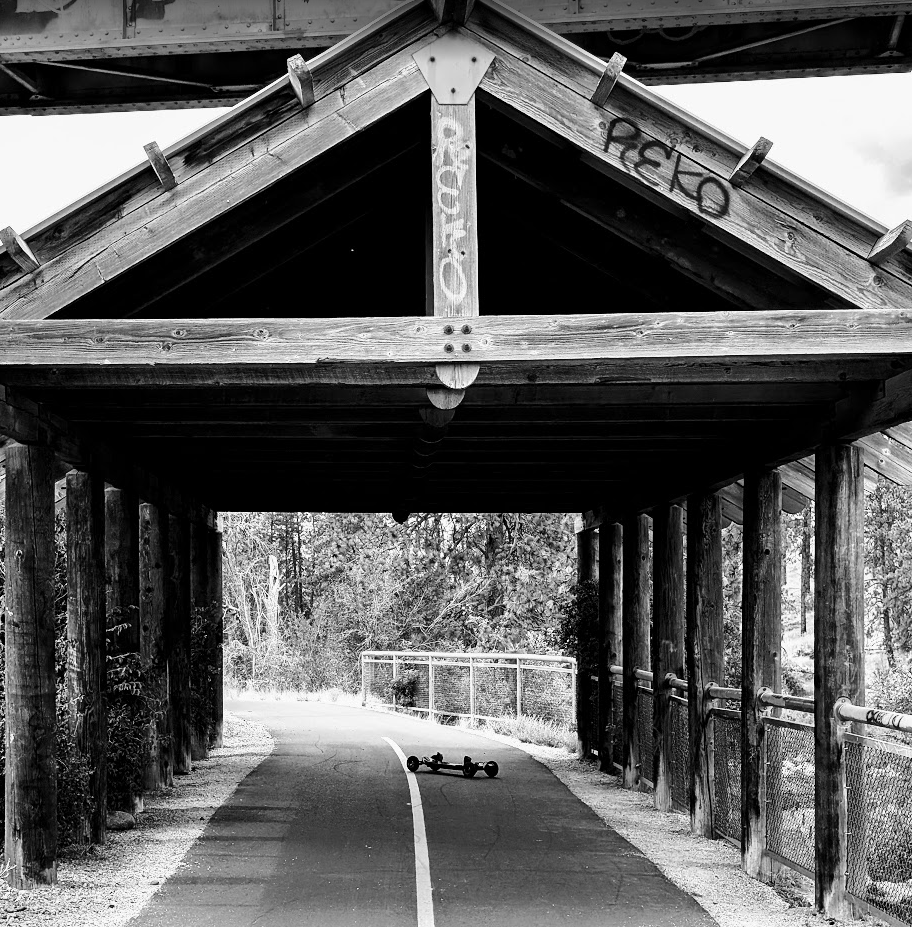
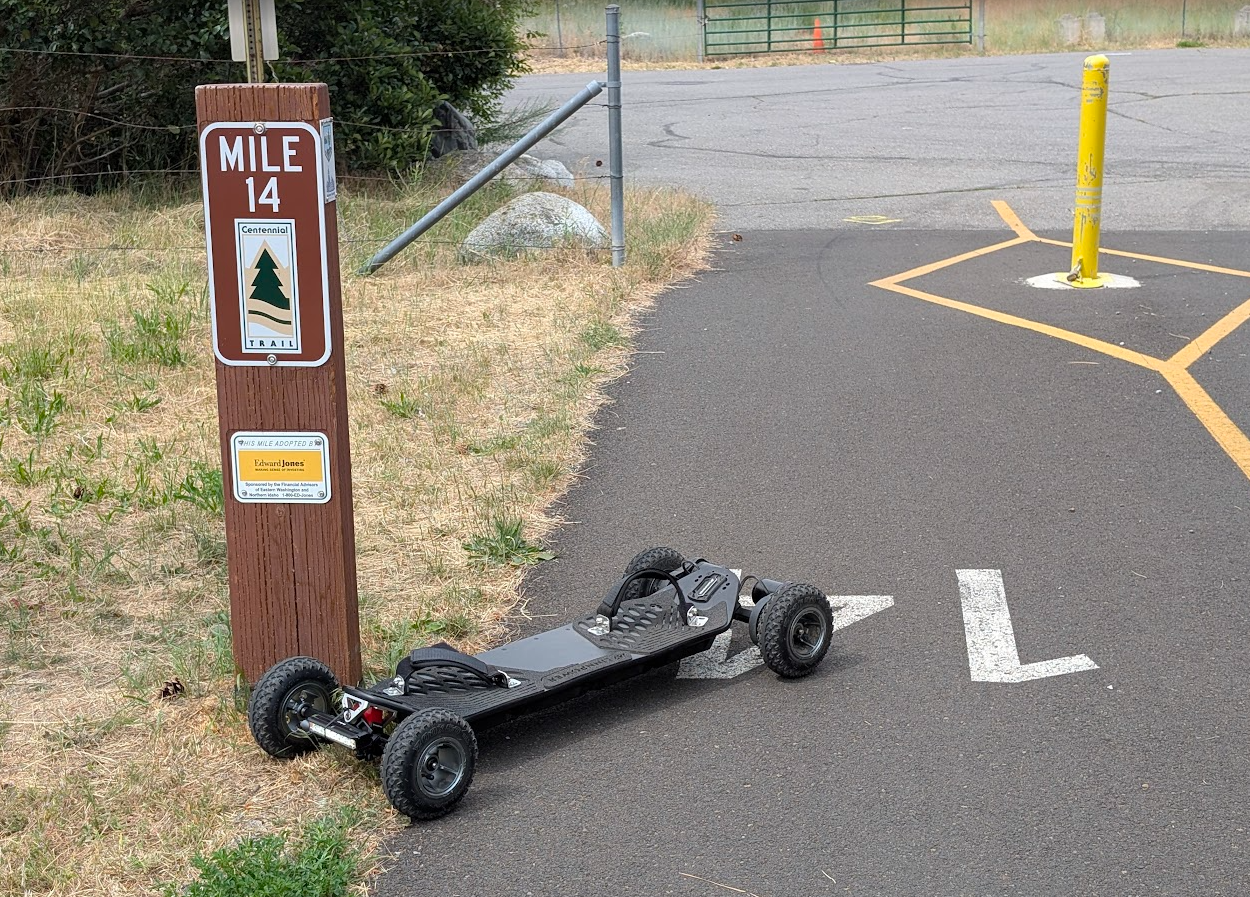
It's crazy how things sometimes end up... the board came from North Idaho, and here it is, 2 years later, back in North Idaho. Never saw that coming.
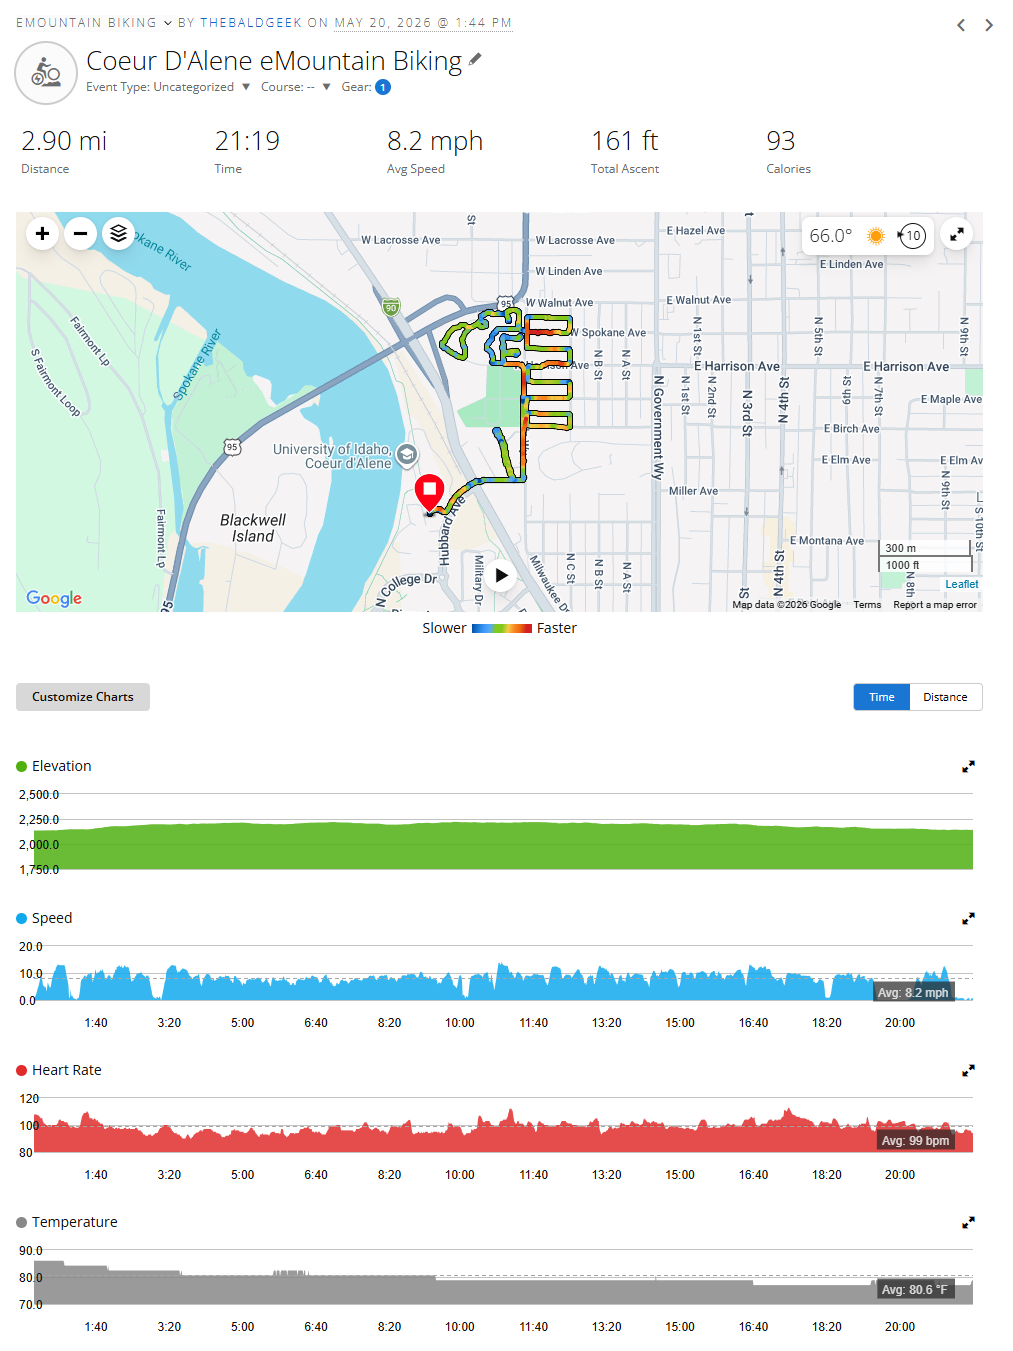
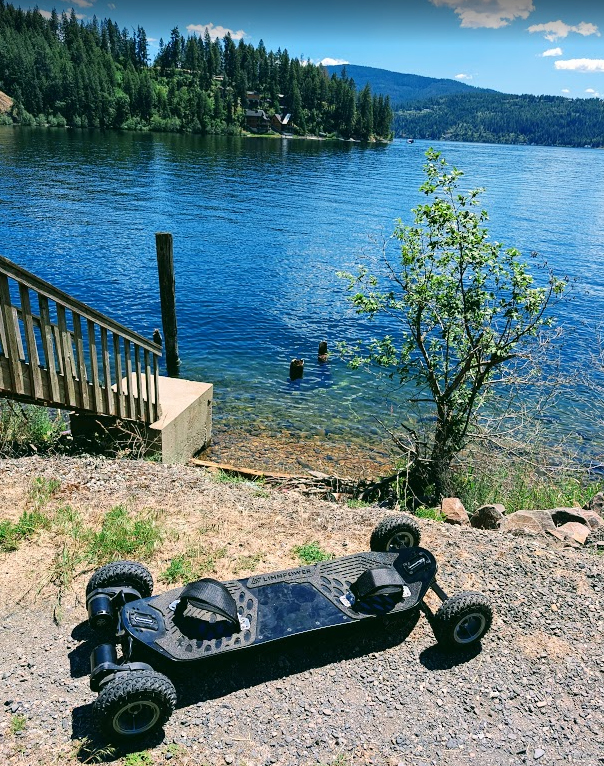
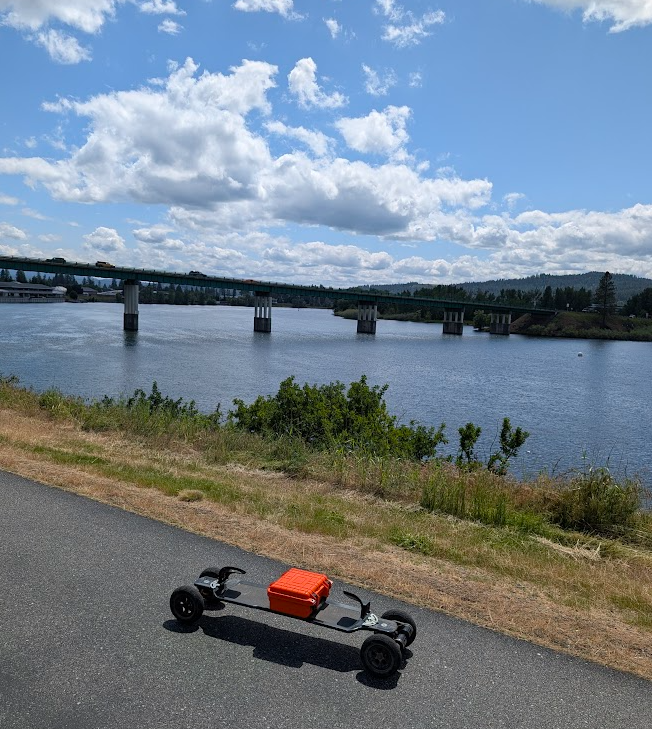
Random example ride. I track every ride with my Garmin watch.
Yes, I love the data, but as you will see, its actually useful to me and my geekness.
It helps me visually by having a map on my wrist. It is also helpful to keep track of total miles on the board for maintenance reasons.
The watch really is key to ensuring that I warride every street in any given ride. Or just assist with navigation when exploring new ground.
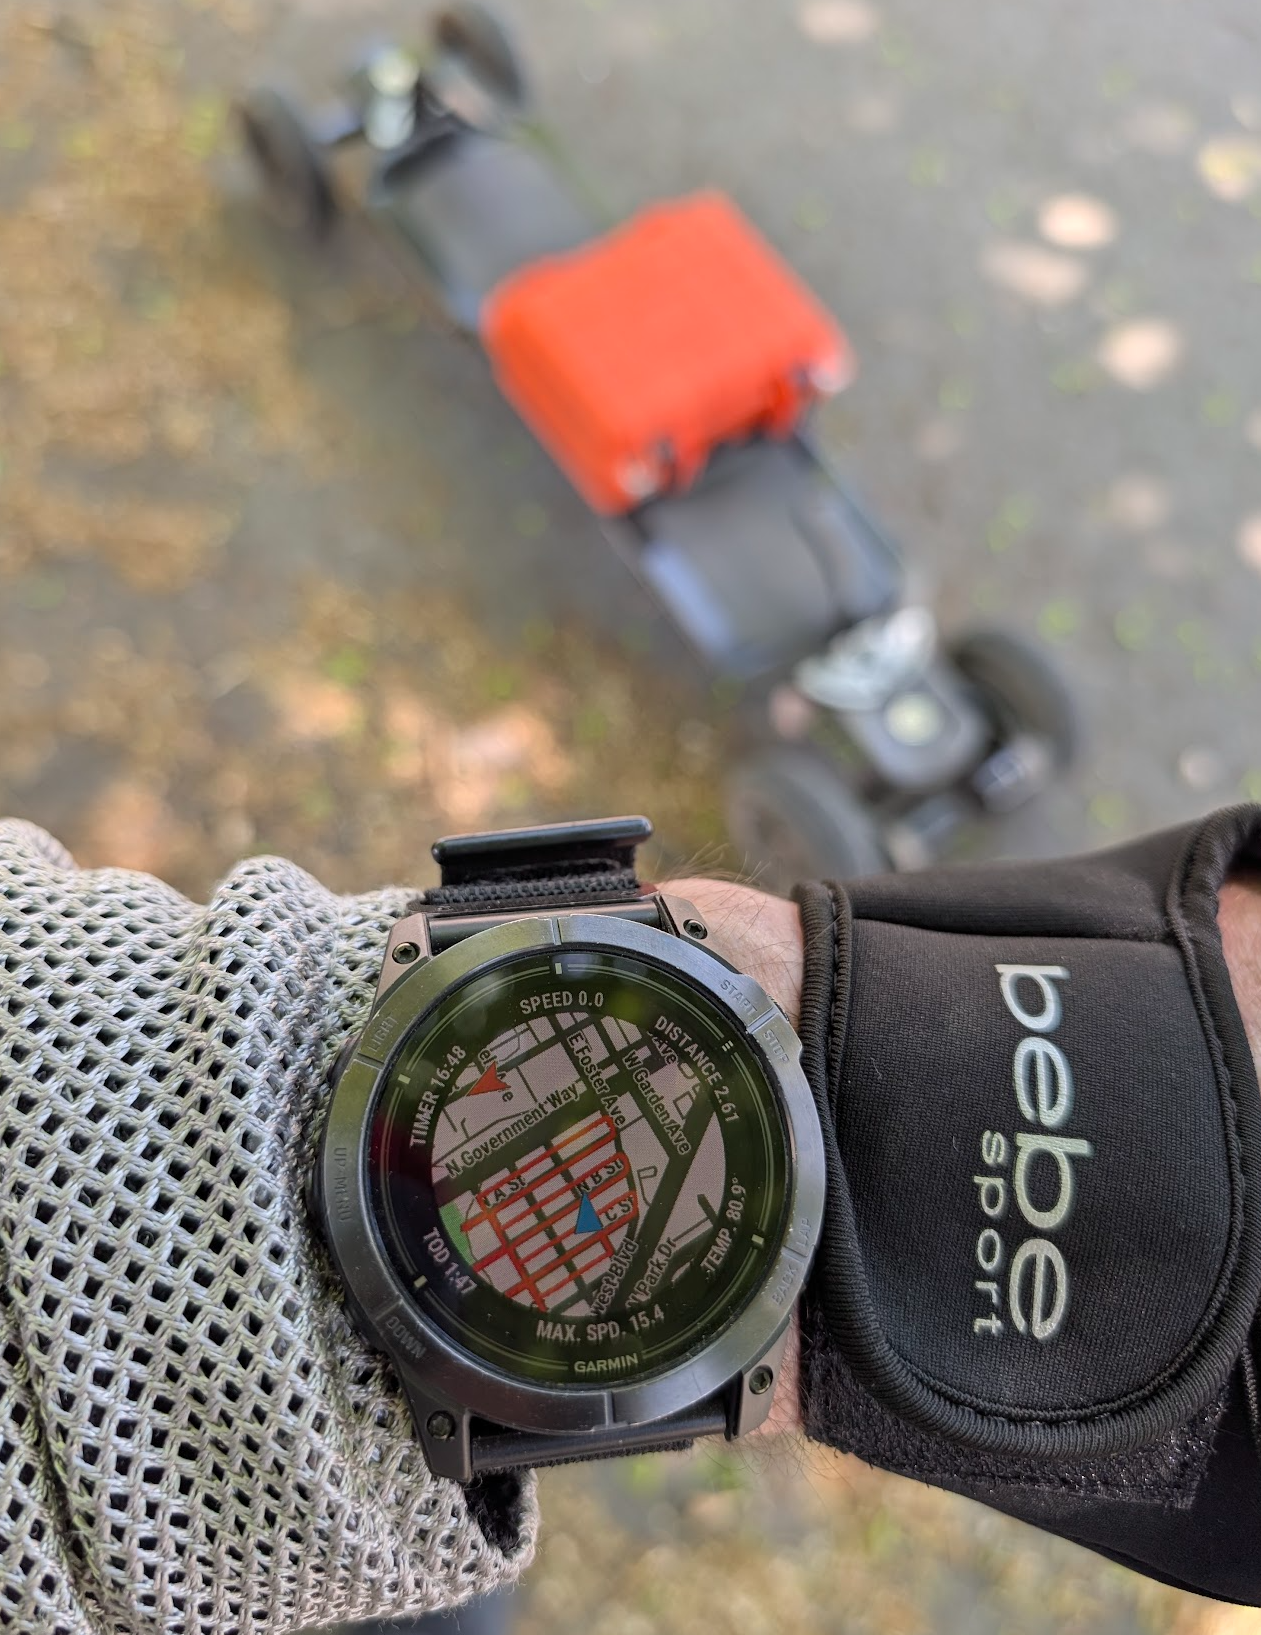
Around the edge of the map are some key data points.
The ride timer is useful when I am riding at lunchtime, as I can easily lose track of how long I am out for, and I don't want to run past my usual 30 min. Most rides on the weekend, I ignore this one.
Live current Speed at the top centre is helpful as I tune the board; it's pretty key to know what speed the wobbles started at, for example.
Distance I use to try to track battery life on the ride. This is somewhat cross referenced wtih speed.
Temperature is also roughly linked with battery life. I mostly ignore it since it's more 'wrist' temp, rather than a more helpful air temp.
Max speed at the bottom is helpful for board tuning.
Lastly, TOD, time of day, is useful on the weekend as I usually have a rough idea when sunset is, so it's a 'be home by dark' sort of thing. I have a headlight now and am looking forward to doing some dusk rides, as I recall loving riding my bike through the Australian bush at night.
The other reason that I track each ride via Garmin....
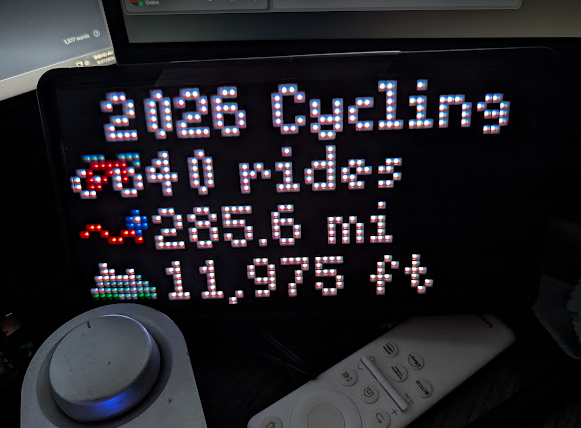
Garmin syncs with my two Tidbyt dot matrix displays.
It's a bit goofy, but pretty fun way to track the total rides for each year.
Why do the rides show up as MTB biking? Because the Garmin snowboard (the only 'board' activity in the whole Garmin eco-system (go on, get me started) auto-tracks and auto-starts each ski lift UP and then ride DOWN, so it won't track anything when skateboarding or longboarding. I tested most of the Garmin 'modes', and honestly, the cycle is just the best match for electric longboarding, given all the ways I use it from the watch to the lounge room.
I have not ridden my bike for years. If I ever get back into it, I will have to figure out how I am going to track those rides without polluting the longboard data.
This wraps up the past year and a good bit with this board.
I'm going to keep it as is, ready to go, but hung up in the shop.
Long introduction to the blog was, in fact, very long.
Having proven to myself that I enjoy riding and want to keep riding for years to come, it was time for a real solid upgrade.
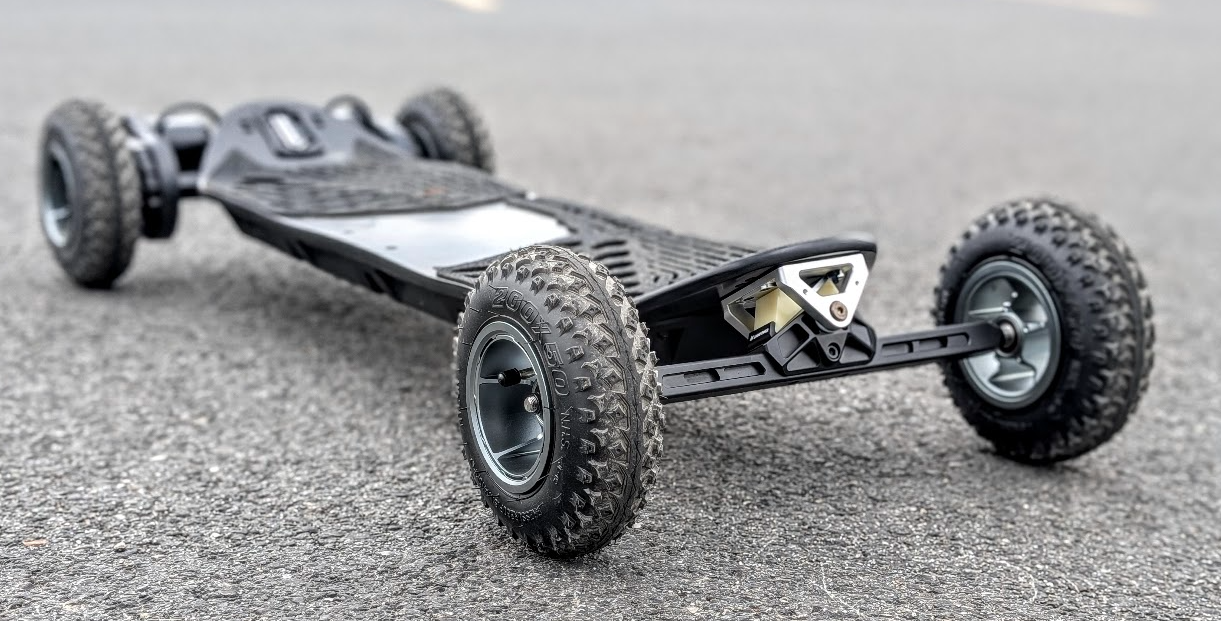
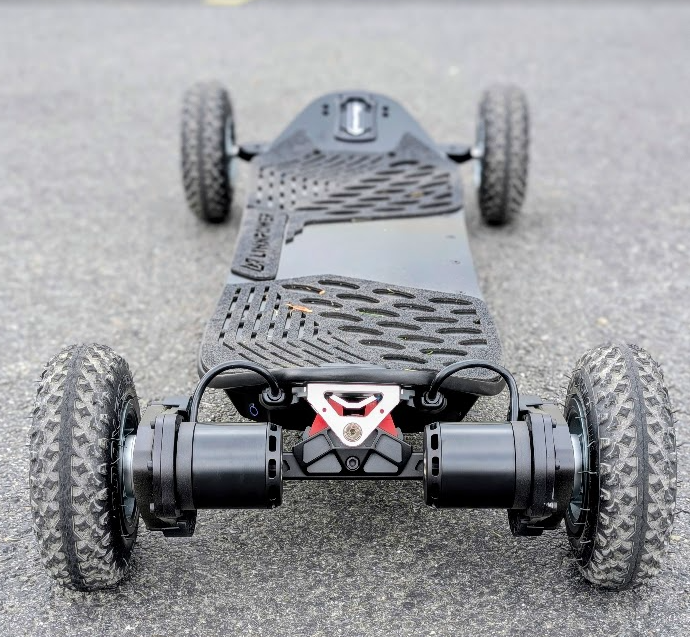
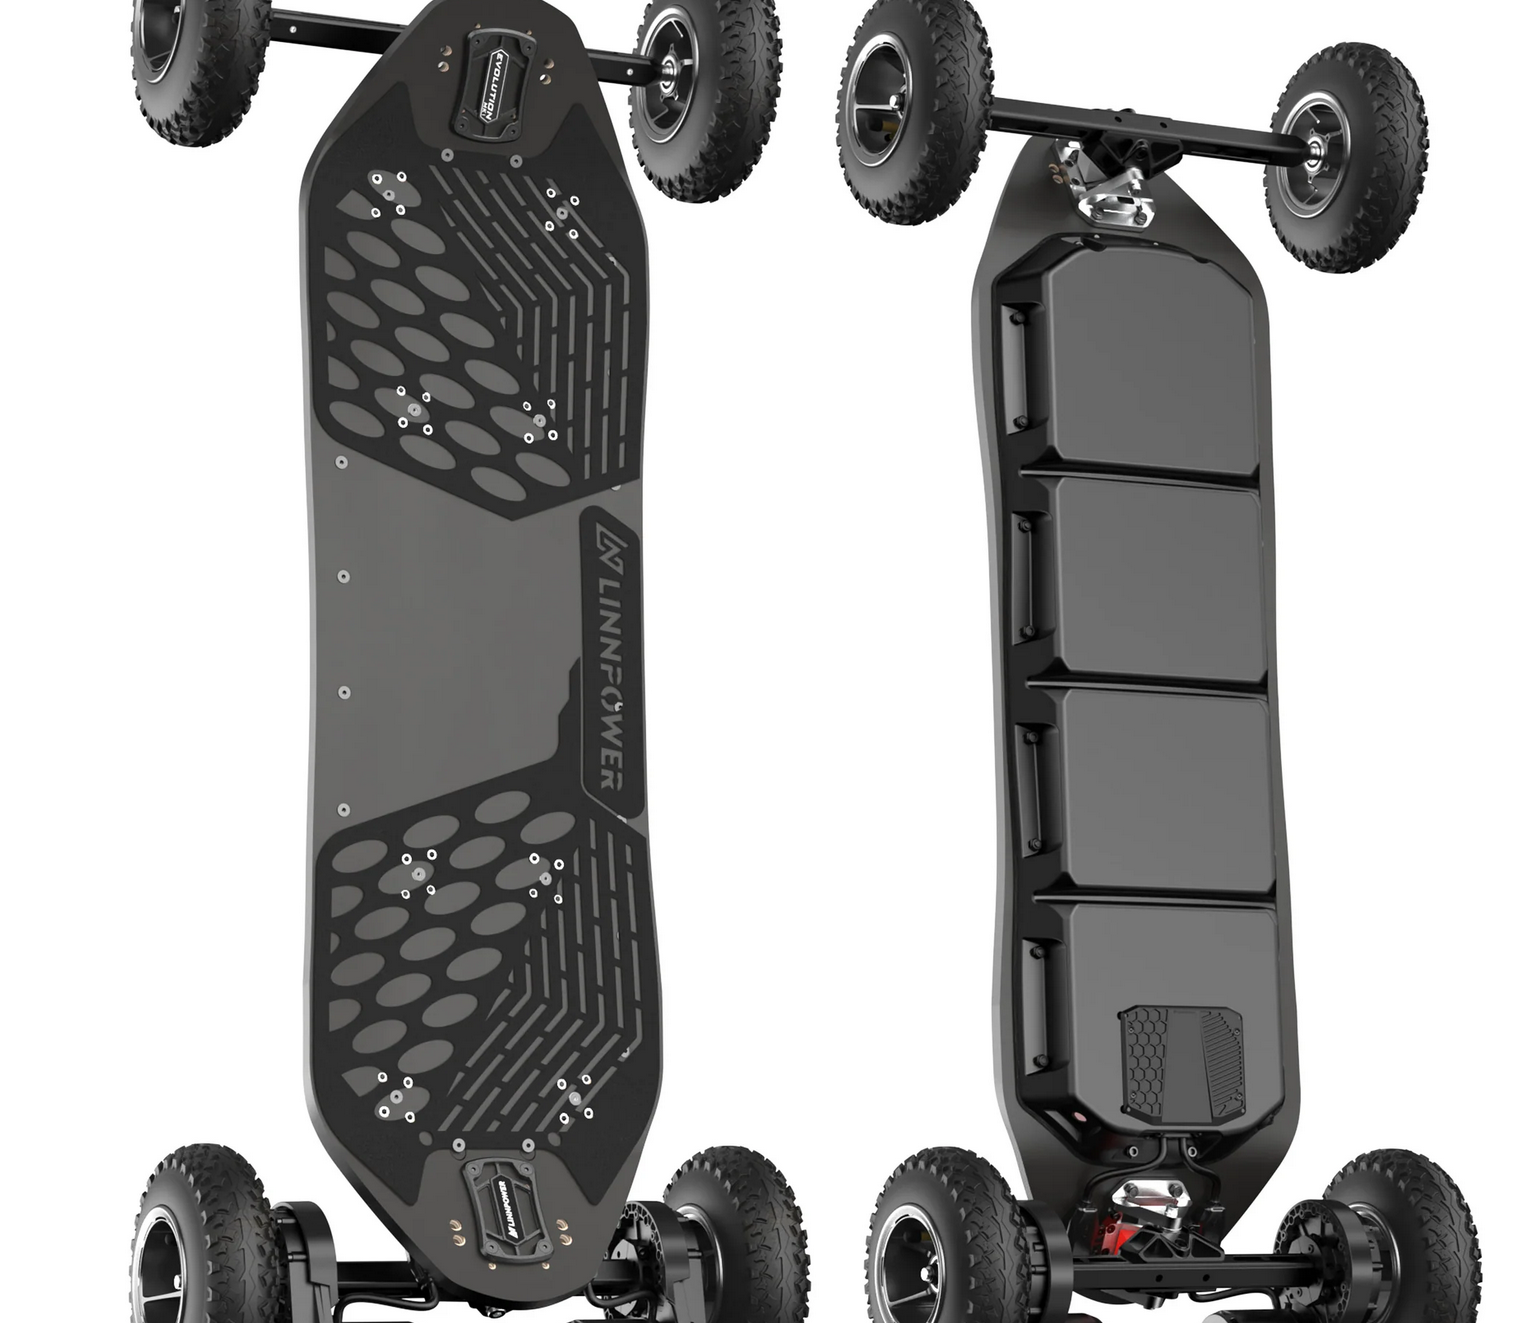
Linnpower Evo Mk 1
The rear brake light is still in transit from the factory.

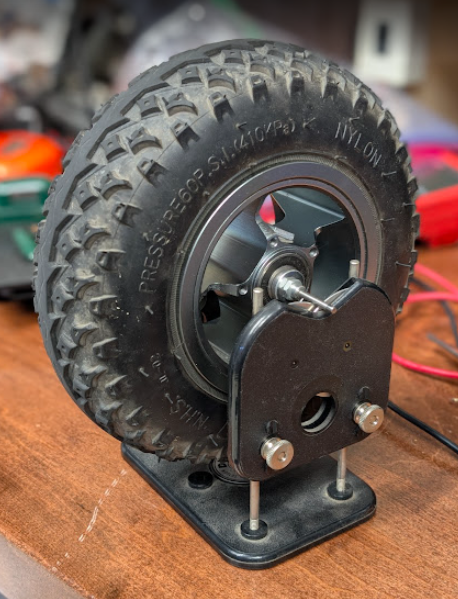
That's all battery under the deck. 40 miles range - more on that further down.
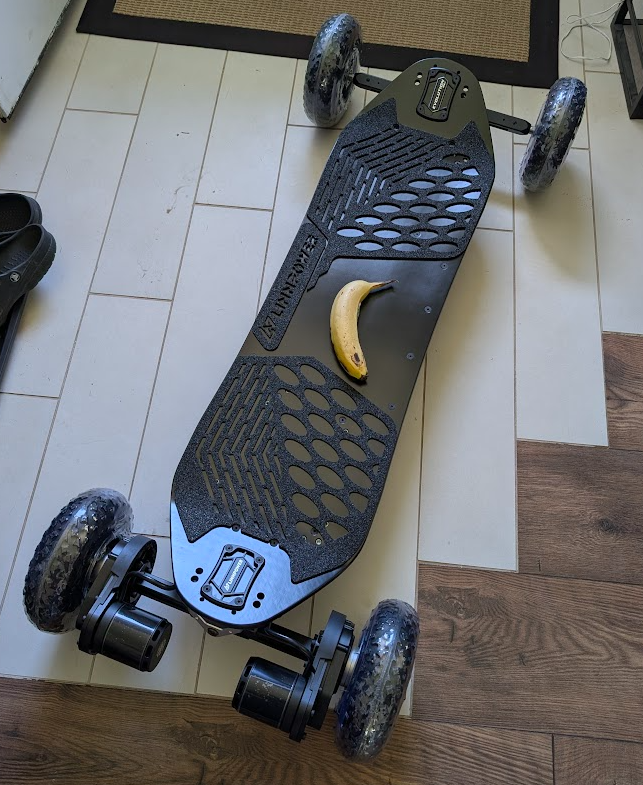
It's a big (heavy) board, so why this one?
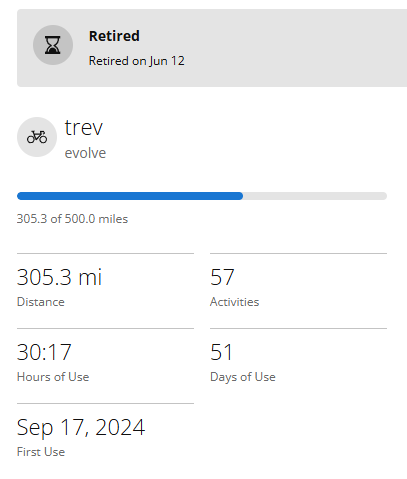
I had a pretty tight budget. I could have spent more and got more range out of the box, but then I would be looking at a top battery box like the old board, and I wanted something a little cleaner for 80% of my rides. Also, by NOT having a top battery box, I have the option to put one on, at the size I want, when I want to do longer rides and save the weight and bulk for 80% of the rides.
Also, by having a lighter board, I get better handling when I'm just squirting around apartment blocks and the like. And of course, I saved about $1000, which is not nothing.
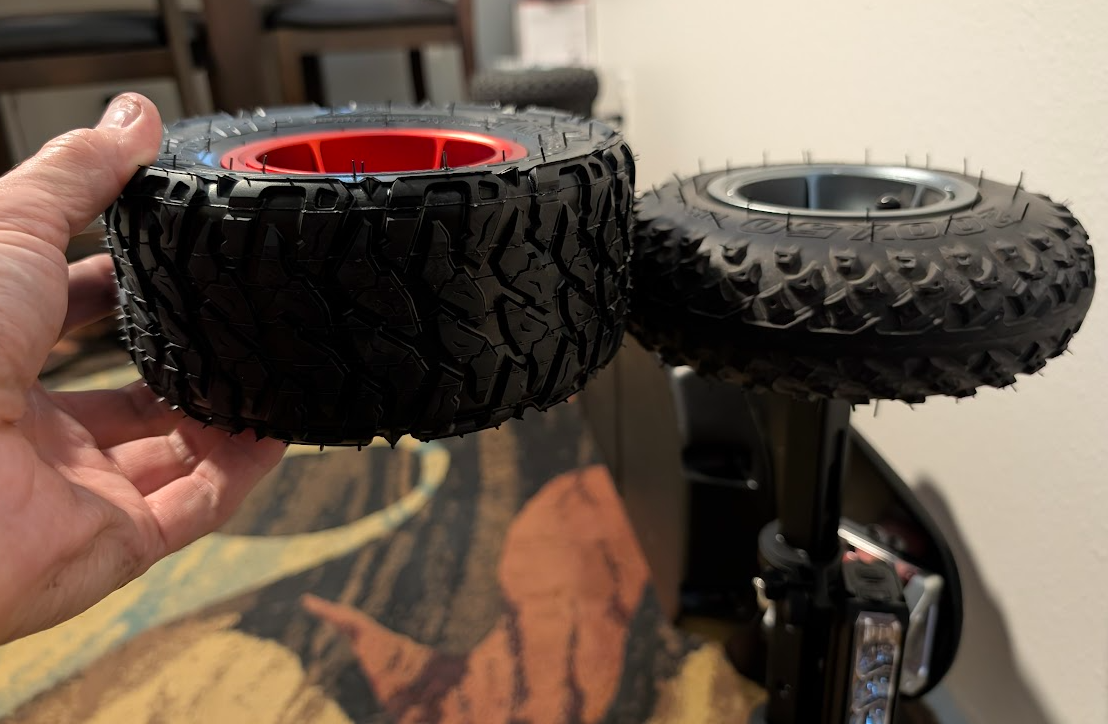
From the 1000-odd miles ridden on the old one, I knew I had to have 6 to 7-inch pneumatic tires to cushion the ride for my old knees.
Chose to save the weight and cost on getting a board without suspension - Miss Linn has very nice deck flex.
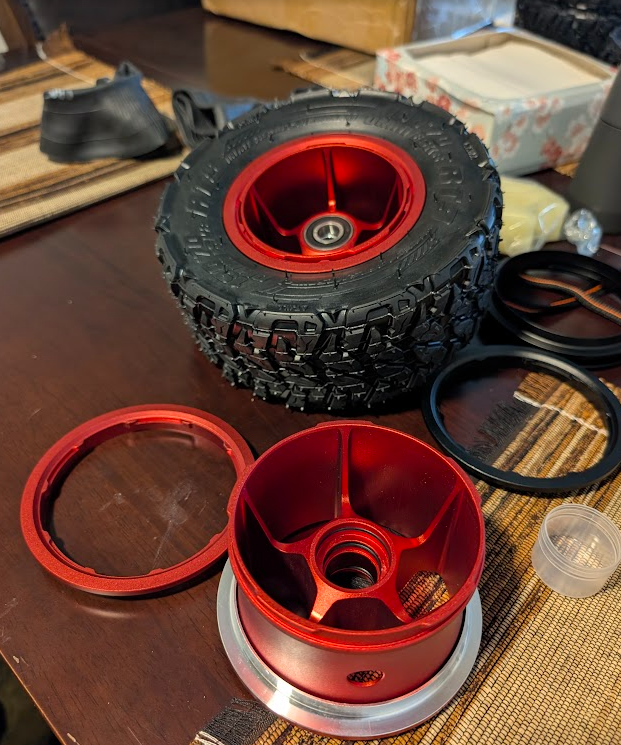
Miss Linn has some really interesting split rims, which makes it a LOT easier to pull a tube out or swap tires - so that was taken into account as well, since I have fought with pulling the old board tires off and fixing slow leaks in the tubes.
Gearbox drive. The old board had belts, and I had a LOT of trouble with them, so I knew the next board had to have gearboxes.
Oddly, this requirement really narrows down the number of board options one has, but it was very, very much on my 'must have' list.
Wanted a similar style remote control as the old one (thumb roller).
Wanted a cruise control function on the remote.
So yes, Miss Linn is an attempt in finding the sweet spot in all the electric longboards around today (and there are MANY to choose from) and their many different features and roles.
The first longish ride I took, I got the usual numb feet. That means the wheels were out of balance. It's odd how you can't really feel it vibrate; the board seems to ride plenty smooth, but the after-three-miles-you-cant-feel-your-feet is a dead giveaway.
The old board, I just did a rough on the axle balance, but this one deserved better, so I broke out the old DU-BRO propeller balancer I've had forever.
I've balanced the wheels with stick-on lead weights. Most only need 1/4 ounce or less, but of course, there is always one....
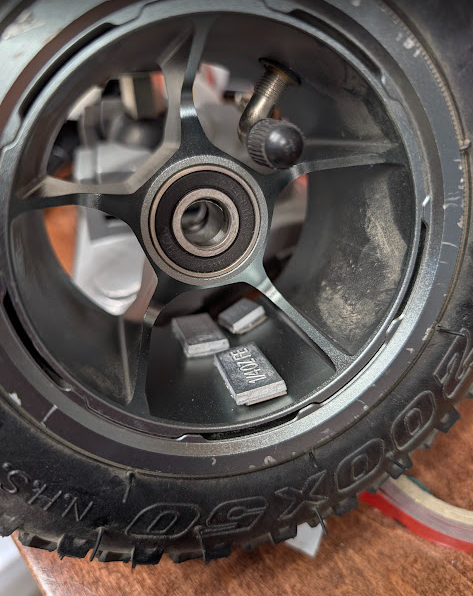
It needed a fair whack more.
I intend to split the rim and rotate the rubber tire around and thus get the tire to tube weight balance better aligned, but till I get the time for that, this 4 x tire balance job transformed the board to be glass smooth (on a smooth bike track).
Worth noting in that last photo is that it's not just the valve stem that makes one side heavy. The rubber tire clearly has a heavy spot on it as well. Hence, the split rims will come in super handy to be able to move the tire around and get it better balanced with just the tube and tire combo.
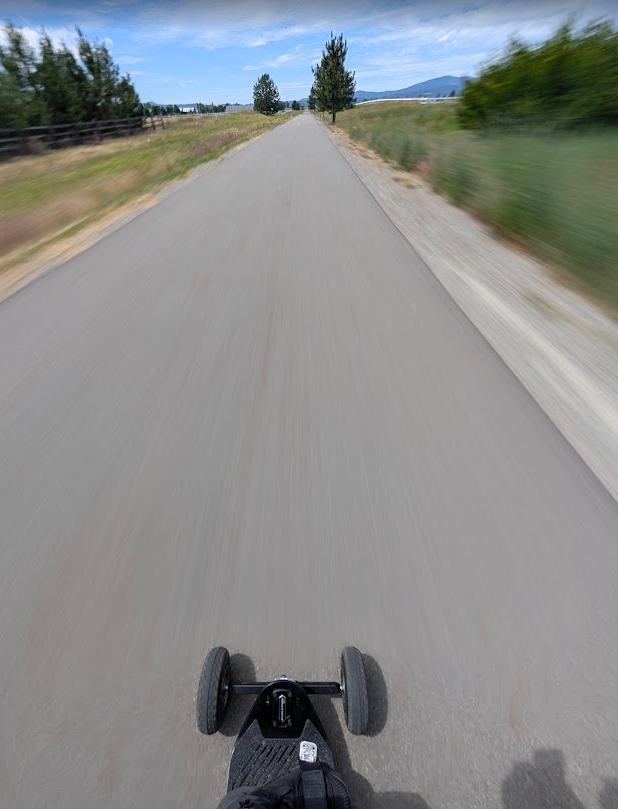
Not a big deal off-road, but 80% of my riding is either normal roadside or bike trails. The bike trails up here are really super smooth and rather long (Some are 20 miles (32ks) of ultra smooth tar), so having that glass smooth ride is just so so nice.
I got some cheap Amazon Velcro bindings on the board at the moment... Given the size and weight of this thing, you really need to be connected to the board - not just standing on it - to be in control.
They really made a big difference, and they have proved that you really, really need to be connected, so I've ordered some MBS F5 bindings from Denver to make the board and me as one.
The key reason is so you can put some weight into either your toes or heels on the very edge of the board and thus get it to really hold in a corner/curve.
Here is a really big tip for placing your bindings that I've not read anywhere else on the web.
Find a good, straight, flat bit of road. And I do mean flat. Be very careful not to pick a path that has some left or right camber. You need dead flat!
Ok, stand on the board and get going at about 5mph. Feel your body. You want to stand on the board in such a way that you are very relaxed, neutral stance, no pressure on the balls or heels of your feet, and you want to be sure the board is moving dead nuts forward, not even a hint of left or right action.
The point here is that if you have either foot slightly off the centre of gravity of your body, you will be tensing your leg muscles and cramping your feet to keep the board going straight.
Once you find your spot on central point of your body/feet to board position, either take a really good mental note of where your toes and heels are, or use your phone camera while you are standing on the board to take a photo.
THATS where you want to place your bindings to wrap your feet.
Another comment here, you want the bindings to go over the bridge of each foot.
Not the toe and not too far into your ankle. The point of the binding is that you can lean into it for either a left or right turn. You are using the binding as the lever point.
Yes, its going to take some time / miles for you to build trust in the binding that its not going to let you go and you really need to build that trust so you can dig your toe in and push down on the lip of the board, or really mash your heels into the other edge of the board and trust the bindings to hold your almost full weight and lift your toes off the board totally to really carve into the corner and hold the chosen line.
Slight side note, it's super annoying that Linnpower do not laser cut the binding holes while they are cutting the rest of the deck tape just like this photo of the board from their website....
They also do not provide a 1:1 diagram for where the binding mount points are, so you have to peel, stretch and hack at your new deck tape to try and find where the binding mounts are.
This photo is the best I have found that shows where the binding points are.
It's the little things like this that can make a really big difference to a brand via that new board feeling....
After you have done about 20 to 30 miles on the board, you discover its big big weakness.... It's a one-trick pony. It can either go in a straight line at anything over 15mph, OR, it can turn corners. You CAN NOT do both.
The stock channel trucks are just trash.
There are two levels of channel truck dampers, Red is the stiffest and white is less stiff.
You always want to run the rear tucks tighter than the front. But even with white up front and red down the back, you just can't adjust the tension such that you can turn in under 2 lanes of road space and do over 15mph. It's a massive kick in the teeth for a board that costs this much.
With red/red and pretty tight, I've had the board up to 36mph and it's a ton of fun.
With white/red, you can move it around most corners, and it feels really planted and smooth, but still can't be adjusted to turn on a 1 lane road, and you feel like you are going to die over 15mph. Riding the board like this is anything BUT fun. It's a drag feeling so tense while riding.
It's like walking on a slack line, not the wobble part, but it constantly feels like it's trying to flick out from under you and either land you on your ass or splat you on your face.
This is a huge deal. The number of times I've had to come to a stop, get off the board, move the nose into the direction I need/want to go and then remount and start off is beyond count. I never had to do that with the old board.
My old board would easily whip around in 1/2 to 3/4 of a lane and easily hold a solid 15mph, so I know it's possible to have a bit of both.
I'm trying to order some trucks to fix this, but they are out of stock... More to come on this, but it just feels really annoying and disappointing that you have to do and spend so much to get this board to perform like something from 10 years ago.
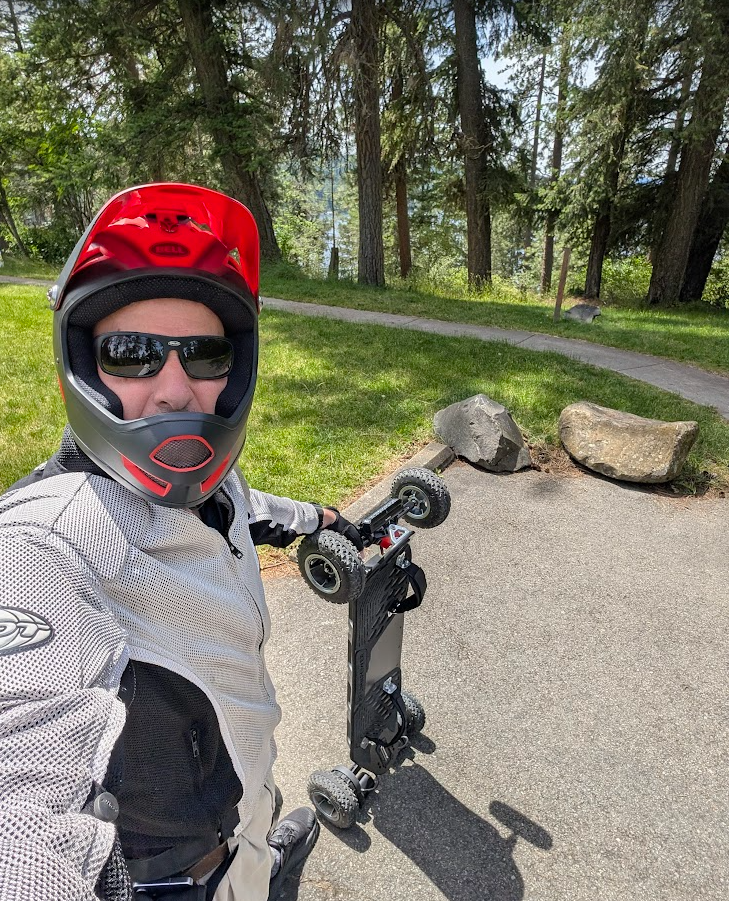
All that said, what's impressed me with this board is that it's not a toy, not a hobby, but an actual serious mode of transport.
I've been riding it to work and back every Wednesday (weather permitting), and it just eats up the 10ish miles there and 10 back each time.
I've got it down to 30 minutes, and so it's just a solid commute vehicle.
I really never saw that coming. If the cars broke down, I could actually ride the board to and from work every day as needed. Sure, snow or heavy rain would make it tough, but even then....
Closing comment about it being a serious mode of transport...
Aircraft have a really interesting message you sometimes catch on ACARS.
CTP, or PNR.
Critical Turning Point or Point of No Return. (I love catching the 'ice flights' from NZ to Antarctica and trying to catch this message on my website).
Is the spot on the flight (usually over the ocean) where the wind and other factors mean you have enough fuel to turn around and make it home, or you are committed to push forward and be forced to land at your destination.
I have no interest in lugging Miss Linn back to the car if I run out of electrons, so I obsess about my range and when the required spot on the ride to turn around is, so I don't get home with a ton of range left, and so I don't have to do the walk of shame.
Two trains of thought to find my critical turning point....
First up. There are a few cheap sensitive voltage meters that provide a % and about 10 bars on a fuel gauge-type display, I can buy via Amazon.
Was thinking of mounting one of those to the nose of the board so I can look down and get a better idea of when I am at 50% and need to turn around.
(The remote only has a 5-bar battery gauge - very coarse and not really all that useful).
Second, and more along thebaldgeek line of overcomplicating things....
I need to open the board up and put in a shunt so I can monitor battery drain in actual units (Amp Hours and watt hours) and do it for both charging and riding, so I can get a really hard number of the state of the battery and the current drain rate.
Going one step further. Put a GPS on that gauge so I can look at both speed and elevation change and mash that into the calculation of the amount of power being drawn from the battery.
It will soon tell me the optimum speed for riding into a headwind vs tail wind and the distance remaining vs the hill I am going up etc.
ie, put a Raspberry Pi Zero computer and a small e-ink display on the board and thus get a real, solid gas gauge that is accurately telling me not just how fast I can ride, but also when to turn around to make it home just on empty and not before or after empty.