I felt my network was out of control. Was it really? That was my problem… I did not know what it was doing, in or out of control, I had no idea.
Need to monitor it then.. and once we are gathering the data, then we can make informed decisions.
In other words, “You can’t control what you don’t monitor”.
Really rough brain dump for selecting ‘The Dude’ to do that job at home.
SNMP.
Simple Network Management Protocol.
This is the right tool for the job of network monitoring. It has been around a lot of years, is a bit of a standard, and works on Windows, Linux, managed switches and Raspberry Pis.
The best way to use this protocol is to use some SNMP monitoring software. There are Open Source, free and paid options. Google will guide you. (I have tried Cacti, Nagios, Zabbix, Ntop and The Dude). Look closely at the features, look at the amount of hosts the free versions support, look closely if the free version shows ads on the reports etc etc.
In the end, you just have to pick one and stick with it (wort’s and all). The longer you work with it, the better you will get at working around any shortcomings it has. One feature I would look at is its reports and alerting features. Sadly, The Dude seems to be lacking in this area.
I chose ‘The Dude’ from Mikrotik. We have been using it on and off for years and years thanks to Dan. I like the mapping feature. It’s not open source, but it is free.
One major gotcha with this application; They no longer are developing the Windows server. They are only developing their routerOS version.
Not all the features of the Windows platform has made it over onto the RouterOS version yet, so its sort of in a no mans land at the moment.
I am happy with the features and bugs on the Windows version, so I am mostly using that, but I have purchased their minimum level router (Mikrotik hEX RB750Gr3) to run it on.
Here is an auto generated map of my network generated by The Dude.
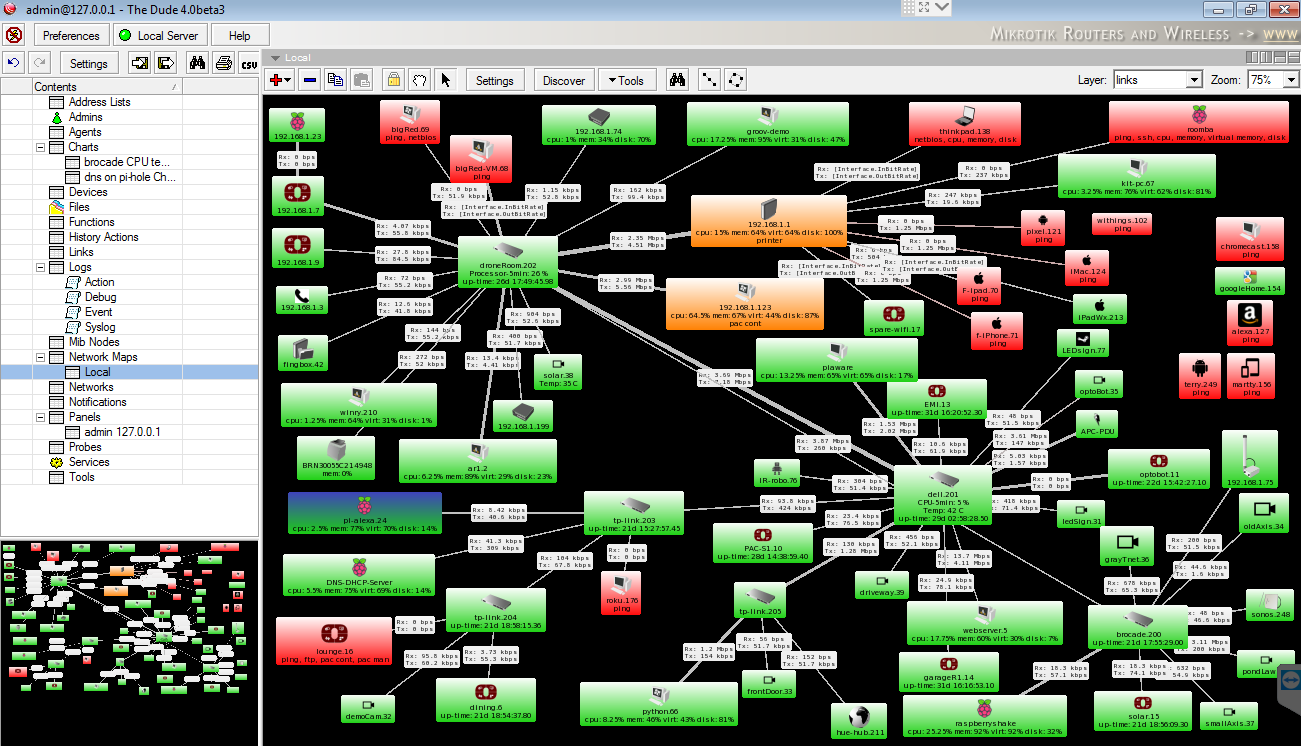
I am a very graphic/visual guy, so really like The Dude for this reason. Most of my interaction with The Dude is through this map.
Double or right click on each object (I don’t mean to ‘sell’ The Dude, most SNMP applications are the same, so just bare with me) to expose the features of each device.
Green is all services up (you can add custom services like port 2001 and 22001 for Opto 22 devices), orange is one or more services are down and red is all services down.
On the links you can see some data, these are the current bandwidth values for that device to that port on the switch.
Hovering over them shows a graph.
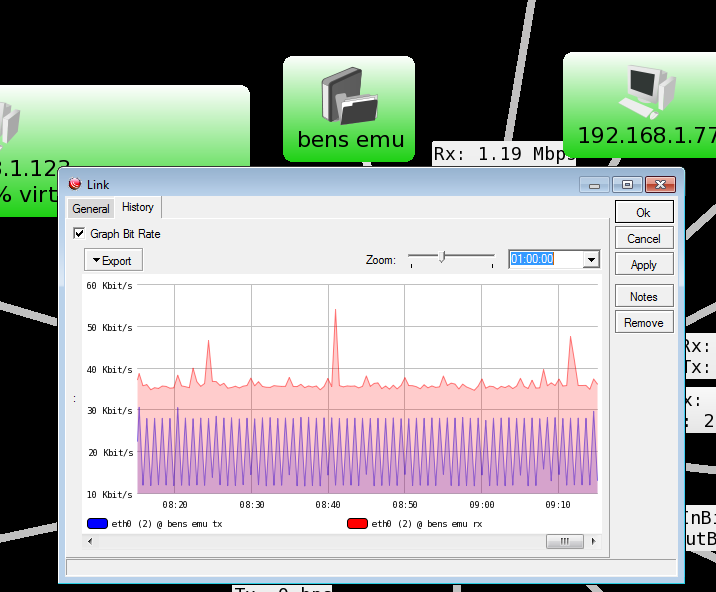
This is for an OptoEMU-SNR-3v. It monitors the house power. You can see that it is uploading power readings (the blue spikes) and is receiving a lot of broadcast packets and data addressed to it.
So how did we get here?
The main advantage of SNMP software is that makes the SNMP tree structure a lot LOT simpler to work with.
Most Ethernet interfaces have some SNMP stack built in, so at the very least, to get SNMP up and running on your hardware, it should just take a software package to install.
What if your device does not support SNMP? If you connect the network port of that device to a managed switch, then you can get some data from the switch.
When Dan was in town, we went to the junk store and picked up a sweet Dell managed switch. We then added 3 more TP-Links because Gary uses them.
Here is a screenshot of the TP-Link;
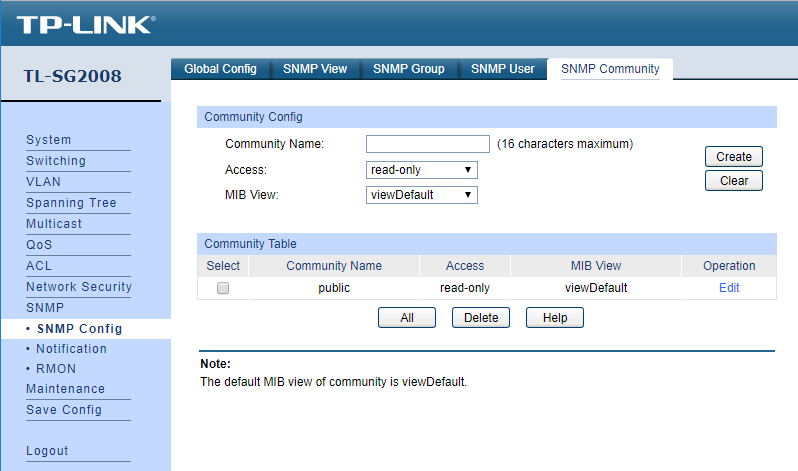
This is one of the smaller 8 port, but the 24 port and 48 port look almost the same.
The important part here is that under ‘Global Config’ you turn on SNMP and then under ‘SNMP Community’ you add a community name.
To check what it is in your Opto 22 devices, open PAC Manager, inspect the device, click on communications and then SNMP;
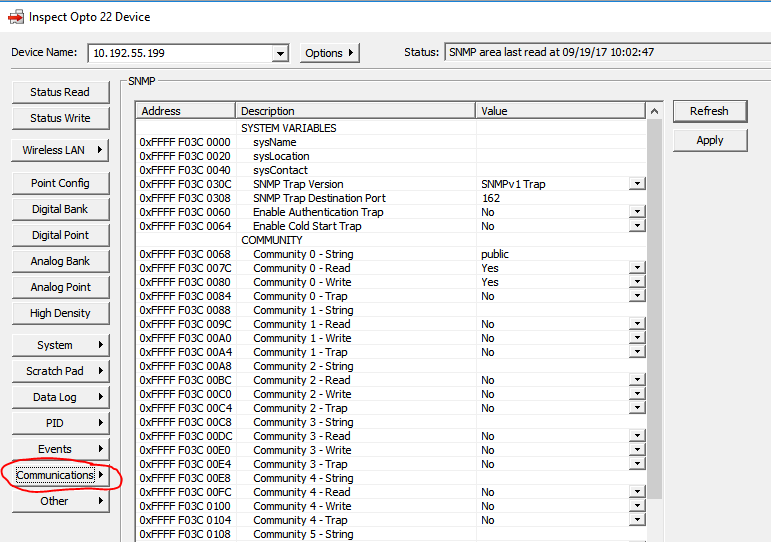
Thoughts about this. IT guys might like to change the community name so that it is a little more secure. You can also set up a user/password for the SNMP user/community/group. I recommend that you adhere to any of their recommendations. That said, for my house, I set it to read-only and left the default group and community name as ‘public’ and no user/pass.
One of the reasons for this is that I wanted The Dude to be able to do a scan (discover) of the network and did not want to have to set up each device or several profiles for the SNMP user.
While The Dude can handle different SNMP communities, when I tried to use it like that, I had a lot of issues, thus going back to the ‘public’ for every device.
Once you have your SNMP client enabled and your SNMP community name saved, you can then unleash The Dude to scan the network and walk the SNMP tree of each device as it finds it.
Here is a typical small section of an Opto SNMP tree screenshot;

I have closed a lot of the tree folders, they go on and on and on and on and on.
You can drill your way into any leaf of the tree and look at just that OID data. Thankfully a lot of the SNMP software knows the tree structure (as I said, its a lose standard) and will pick the right parts for automatically saving a HUGE amount of time.
MIB
A quick word on MIB’s.
MIB’s or Management Information Base work hand in hand with SNMP.
MIB describes vendor specific sections of the SNMP tree that are not in the standard.
Here is the front of the Opto 22 MIB;
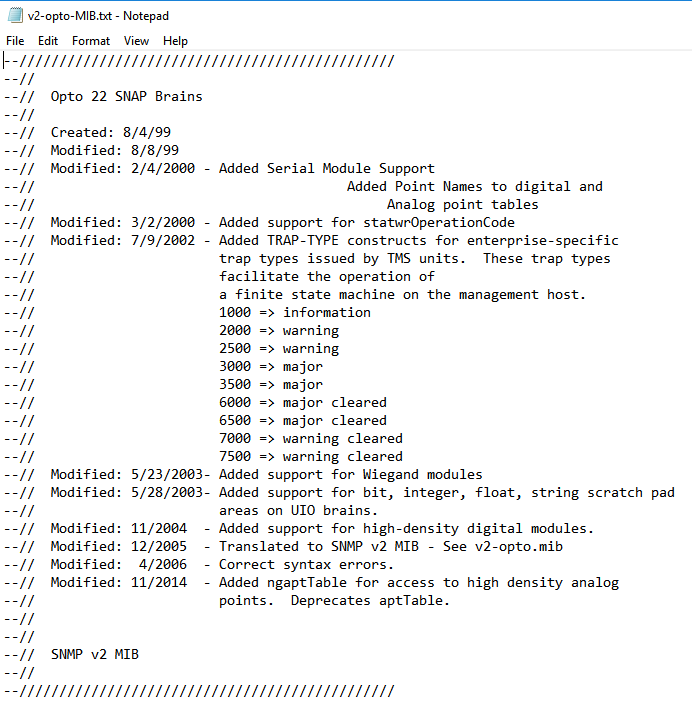
As you can see, they are all things that are unique to Opto 22.
Most managed switch vendors do the same thing, the SNMP standard takes care of all the interface data in/out counters etc, but they might add CPU use or CPU temperature, Fan status/RPM and things like that…. You will find those OID’s in their MIB.
Most network management software allows you to add MIB’s as needed.
So, to summarize.
SNMP is a rough standard.
OID’s are a rough standard.
The Dude knows about those standards and can play nice with pretty much all of them.